Documentation
Using the Client
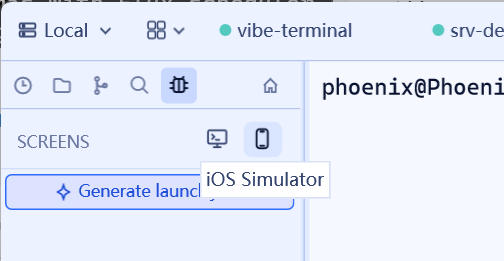
The desktop client opens remote screens from the SCREENS bar at the top of the Debug panel. Every screen lives in its own floating window you can use alongside terminals.
Opening the SCREENS bar
- Connect to the target server (directly or through a relay);
- Click the
Debugtab in the left activity bar (the tools icon); - The
SCREENSbar appears at the top of the panel: one display button per physical desktop screen on the server, followed by theiOS SimulatorandAndroid Simulatortoggles.
Desktop screen windows
Click a display button to open that screen’s window:
- The window is freely resizable (down to 800×600) and the picture re-lays out with it;
- Multi-monitor servers get one window per display; several can be open at once;
- While connecting, the window shows a “preparing desktop” placeholder; if the server lacks capture permission, the window shows the platform’s permission instructions directly;
- Click the bar button again or close the window to stop watching (the button’s active state stays in sync with the window).
iOS simulator window
Click iOS Simulator to open a fixed-size phone-framed window (264×640 portrait):
- The device picker at the top switches the phone appearance; the window re-fits to the selected resolution;
Rotateflips portrait/landscape (524×380 landscape window);- Requires a macOS server running the Xcode iOS simulator.
Android emulator window
Android Simulator works the same way: fixed phone frame, device picker, rotate button. Streamable sources include running AVD emulators and connected real devices; an AVD can also be booted or shut down on demand from the client (see Android Devices).
Windows streaming a localhost server are automatically excluded from screen capture to avoid a feedback mirror; windows streaming a remote machine stay capturable so an outer recording still shows them.